Contents
4.4. How to Customize the Window View
4.6. How to view results owned by another client
5.2. Prefill your own Sample Reg. Templates
6. WebTrieve – Sample registration
1. About ALS Solutions
ALS Solutions is an online application accessible on all devices (phone, tablet, desktop PC) that puts your results at your fingertips. ALS Solutions is best enjoyed using either Google Chrome or Microsoft Edge, but also supports most browsers.
2. ALS Solutions Setup
Once your company has signed an agreement with ALS to use ALS Solutions. ALS staff will assist to set up one or several client administrators that will be responsible of user configuration for your company. New users will be emailed an Email Verification Link which will ask you to setup your username and password. Once you have completed the verification process (the link expires in 48 hrs), proceed to the link provided in the email to access ALS Solutions. You can also access ALS Solutions by clicking on the following link: https://ALSolutionsv2.alsglobal.com/
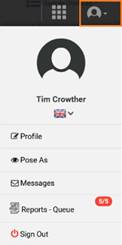
Please note that you can sign in using Office 365, LinkedIn or Google. Click on your User Profile icon in the top right corner to configure social logins.
If you have forgotten your password, just enter your username and then click on the “Forgotten” password link. Passwords are automatically reset and do not require you to contact ALS support.
3. Landing page/Home Window
The home window in ALS Solutions is set-up with widgets so users can be one click away from accessing results, configuring guidelines, online sample registration as well as accessing useful documents and links. Users can configure widgets in the Landing Page Template by clicking on their User Profile icon.
3.1. Real-time Results Widget
The Real-time Results widget on the home window displays the last 10 workorders (WO) received by ALS. To view results, tick the WO checkbox(es) and the View Results button or View More button if more than the last 10 workorders are required.

3.2. Widgets
The widgets on the home window displays single click icons to new tools that will help the user manage projects. Links may either directs you to modules within the system or to ALS-website.

4. WebTrieve – Results
4.1. View Results
View WOs received in the last 30 days at ALS. To change the date range, click on Quick Search, select the date range required and press apply. Note that two years of data is the maximum amount of data available at any one time to display on the window. Results are available once they have been authorised by the laboratory.
From Results View by Batch users can use quick access buttons to View results by sample (Vertical), Apply Guidelines or Export results for selected WOs. Filter by using either the Quick Search or the filters at the top of each column.

To view sample
results from the menu banner, click WebTrieveTM>Results, click on the ![]() icon on the right-hand side of the window and
change the view from Batch
to Sample (Vertical or
horizontal).
icon on the right-hand side of the window and
change the view from Batch
to Sample (Vertical or
horizontal).
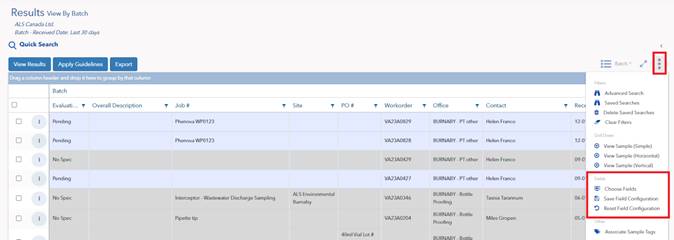
To view Analyte Results Over Time, first filter to only display samples of interest, then click on the 3 vertical dots icon beside any analyte highlighted in red below to view the analyte trend over time. The default date range is one year. Once the chart has generated, click the 3 vertical dots on the right-hand side of the screen to create and save a .PNG file.

4.2. Filter - Quick Search
Searching
in ALS Solutions is easy, just click Quick Search, enter the data in any of the fields and click ![]() . Quick Search can be used in
all views.
. Quick Search can be used in
all views.
4.3. Filter - Advanced Search
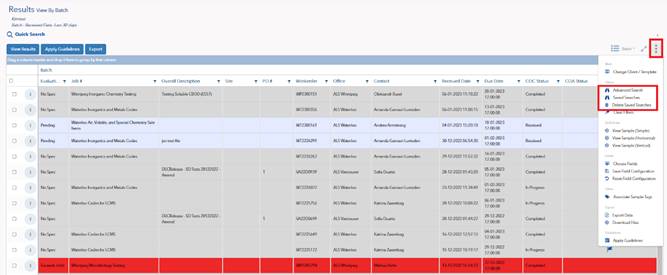
Advanced Search can be used to set up and save searches regularly used. Simply select the 3 vertical dots icon on the top right-hand side of the window highlighted in red below.
Add, edit or delete filters, and save searches to apply at a later date. Saved Searches can be accessed via the Saved Search option highlighted in red below.
Alternatively, the user can use any of the filter funnels beside each column header to filter by that heading.
4.4. How to Customize the Window View
All Fields on a window can be customized to the user’s preference.
To reorder Fields, the user can drag and drop the Fields to their preference. Click and hold the column header and drag to reorder.
To sort each Field alphanumerically, click on the column header
To add or
remove Fields, click
Choose Fields option
highlighted in red below, tick the Fields required and ![]() .
.
4.5. Download Reports
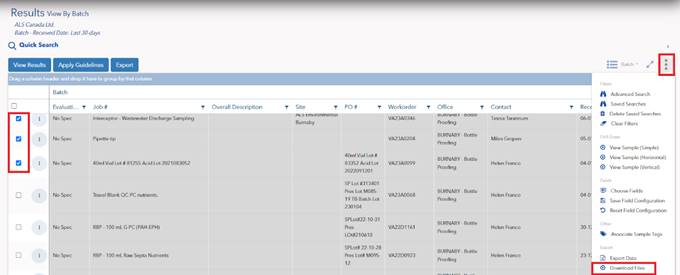
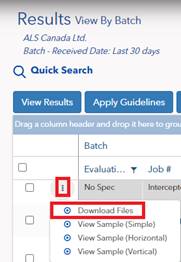
To download the PDF reports for a single WO, click the 3 vertical dots icon in the same row as the WO and the Download Files option as highlighted in red below. To download PDF reports for multiple WOs, tick the checkbox for each WO required and click the 3 vertical dots icon on the right-hand side of the window as highlighted in red below.
4.6. How to view results owned by another client
If ALS has received written permission to share another client’s data with your own data, the Results Views can be switched between clients. Data can be limited to specific projects or client sites.

To
change views to another client, select any Results View (Batch, Sample, etc), click on the 3
dots highlighted in red below and select the Change Client/Template option from the drop down
list. Select the radio button to search by Client, click in the Client field to see the list of available clients,
select the client and ![]() .
.
To
change view to another client’s office (site), select the radio button to
Search by Client Site,
click in the Client Site
field to see a list of available sites, select the site and ![]() .
.
You can download exported EDD-Reports from the Report – Queue, click User Profile icon from the top right-hand side of the window and Reports – Queue.
5. WebTrieve – Settings
5.1. Guideline creation
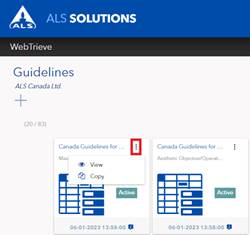
The Guideline Creation window shows all guidelines added and available in ALS Solutions. You can navigate here from the widgets on your landing page.
These guidelines may be available to all users (ALS Guidelines) or only for users for a specific Client (Client Guidelines).
Users can View or Copy any Guidelines by selecting the 3
vertical dots icon highlighted in red below. If the Copy
option is selected, the user can create a Site-Specific Guideline by adjusting
the Lower or Upper Pass
or Warning Limits by selecting the Limits
tab and ![]() .
.
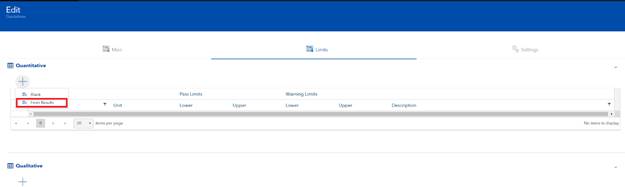
It is possible to add new parameters to your guideline by selecting from previously analyzed work. Go to the Limits tab press the plus sign and select From Results.
5.2. Prefill your own Sample Reg. Templates
You may pre-fill a template with your specific order information. Go to WebTrieveTM>Settings>Sample Reg. Templates and select one of the tabs Work Order or Samples.
A work order template may contain both order information such as contact person, project, quote as well as a selected set of samples and analyses. We recommend that you create a work order template after you’ve logged a new repeating order. Select the online reference number from the order you like to use as template. The most recent order is listed at the top.

Sample templates allows you to set up pre-defined samples, that you can load in the sample registration module, you may configure sample information such as, sample type, sample name, description as well as your analysis request.
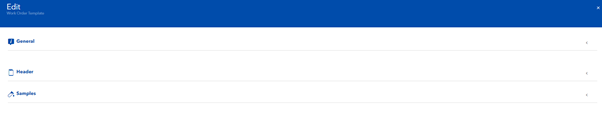
The templates consist of three sections. The name-field in section General creates the inputs in the drop-down menu in the sample registration module, where you may select a template.

5.3. Activate copy paste excel range by default in sample registration.
Each user may activate settings to enable copy paste from excel range to text fields in the sample information table during registration. It can either be set as active by default or activated by order.
If copying a range from another source, make sure that there are no hidden row breaks that may otherwise populate unintended cells with information.
If the range in Excel exceeds the table size in ALS Solutions, the exceeding range will be ignored, while pasting the matching range.
1. To allow by default, navigate to the sample registration module.
2. Locate the three dots on the top right-hand side of the screen.

3. Select options.
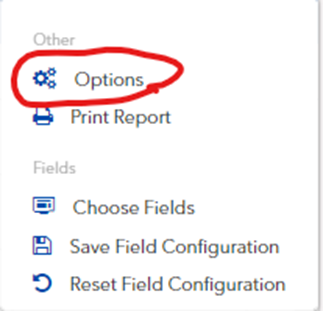
4. Tick the checkbox next to "Enable By Default Paste Excel Range" and press save.

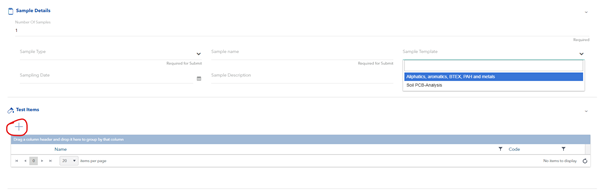
6. WebTrieve – Sample registration
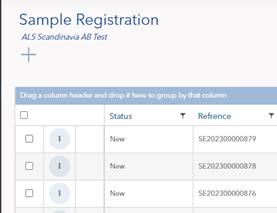
To create a new analysis order, either navigate by with the sample registration widget on your landing page or go to WebTrieveTM>Sample Registration and press the plus sign in the top left corner.
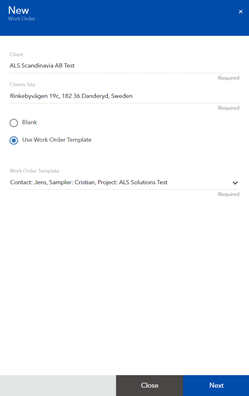
Select your Client Site, then decide to either use a blank template, or a pre-filled template (Use Work Order Template). Press next to continue.
1. Fill out your order information. Contact, quote, turnaround time and receiving lab are mandatory fields.

2. Add samples.
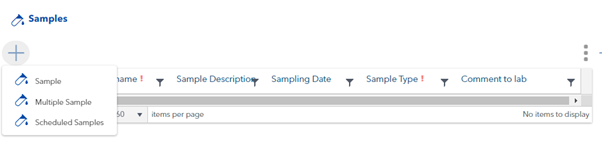
3. Fill in your sample information, it is mandatory to assign matrix prior to adding test items. Select a sample type then add analyses by pressing the plus sign in the Test items section. You may select a pre-defined sample from one of your own templates, learn how to create them by reading Prefill your own Sample Reg. Templates.
4. Make sure that each sample has a name and matrix before submitting your order. If the sampling date is left empty, the submit-date will be used as sampling date. You may copy sample information from an excel range. Press the three dots on top of the samples table and “Enable Paste Excel Range”. Read section Activate copy paste excel range by default in sample registration.

Submit your work by pressing ![]() and
choosing Save & Submit.
and
choosing Save & Submit.
7. Client account - Billing
Users with Client Account permissions and access to the billing office can access all invoices posted within the last 6 months by clicking the Invoices icon in the Project Management Links widget. Clicking on the 3 vertical dots icon highlighted in red below, users can View Details of each invoice, view the Results (Menu) for the invoice or Download the PDF of the invoice.
